Ready, Set, Sign!
 Sign language has been an amazing communication tool for our family. Upon discovery that my daughter has Down syndrome, we were fairly certain that verbal communication was going to be delayed. As a result, we started teaching her sign language at a very young age. Darah is able to tell us when she is hungry, thirsty, hurt, sleepy, and when she wants a bath. She can also participate in “small talk” as well, by naming things she sees or wants like dogs, rain, stars, shoes, airplanes, and yogurt. Darah (at 3 1/2 years old) has over 200 signs now that she uses! Sign language has been such a gift for her and I am so happy that we introduced it to her! When Connor was born, signing was already part of our lives. Connor (now 15 months) learned signs pretty much by osmosis. I am surprised at the number of signs he’s learned just by observing Darah. The other day, Darah was in time-out and he decided to sit in time-out with her. When I allowed Darah to come out of time-out, he stood up and surprised me by signing “sorry.” I then drilled him some of Darah’s signs, and he knew “please,” “thank-you,” “dog,” and several other signs that I never once showed him. He also consistently uses “more,” “all done,” “eat,” “milk,” “bath,” and several other signs.
Babies as young as 10 months old can communicate with sign language. An ideal time to start introducing signs is when your baby is six months old. However, if your baby is older, it’s never too late! Here are some things that you should know when starting to teach your baby sign language.
Sign language will not impede your child’s speech development!
So many people think, “if I teach my baby to communicate with sign language, he is going to take longer to speak.” Actually, teaching your baby to sign will more than likely speed up his verbal communication. Before any child is ready to say their first words, there are some foundational skills that must be learned and some oral motor development that must take place. By teaching your baby to sign, you are teaching him the foundational skills required to communicate. By the time your baby is cognitively and physically ready to start saying words, he will be well ahead of his peers because of the communication foundation he’s already learned. These foundational skills include, but are not limited to:
-
learning the concept of cause and effect
-
understanding the concept of turn taking
-
understanding that two or more words can be linked together, thus creating sentences (as in signing “more milk,” “big ball,” etc…)
Here’s a great article about the benefits of signing with your baby.
Reinforce with your spoken words!
When you sign with your baby, make sure you are saying and signing the word very clearly. Your baby is fascinated by your face; make it interesting by exaggerating your mouth movements. Be sure to talk to your baby all day long about anything and everything. By telling your baby about the train that’s passing by and talking about the yogurt and milk in the dairy aisle of the grocery store, you are reinforcing their receptive language skills.
Start off slowly
Begin by teaching your child 1-3 signs. “Milk,” “more,” “eat,” and “all done” are great signs to begin with because they are things that surround your baby’s daily life. Teach your baby signs that you have ample opportunities to use throughout the day.
Use your signs in context
It’s so much fun to show off our baby’s newest tricks, and sign language is a great way to capture those “oohs” and “ahhs!” However, make sure that when you are modeling or asking for a sign, it is in context. Asking your baby to sign “apple,” when he is neither hungry nor are there any apples around can potentially confuse your baby. The goal of teaching your baby sign language is to teach them a way to communicate their wants and needs, so make sure you keep it in context!
Don’t give up!
It is going to take you modeling a sign many many times before you see your child imitate. Keep going. Help your baby by doing hand-over-hand signing. This is where you take your baby’s hands in yours and do the sign together. Your baby will catch on! Just remember to be patient. Once they learn a few signs, it’ll get easier and easier to teach new ones. The first few take the longest to learn. Just make sure you’re consistent, enthusiastic, and give your child lots of praise for any attempts made. Your baby will have their “ah-ha” moment and will become a signing junkie!
May I recommend?
Baby Signing Time Volumes One and Two
These are excellent dvd’s which incorporate wonderful beginning signs with fun, catchy music. Both of my children love the Signing Times series and the Baby series is top-notch! Their website also has a lot of great information for parents who want to teach their babies to sign.
What has your experience been with sign language and your children?
Share the fun: Email + Del.icio.us + Digg + Technorati

 In an attempt to motivate myself to get back in shape, I signed up for a 5K race which is equal to 3.1 miles. I had no idea how fun this accomplishment was going to be and strongly encourage you to try it. I decided about two months ago to run this race and I committed to run three times a week. I started off only running a mile at a time, and worked myself up to the full 3.1 miles. I charted how many miles I ran so I could look back and see how well I was doing and how much I was improving. I also got some great music for my Mp3 player to keep me from getting bored during the runs. Boredom is my greatest obstacle with running, however, frequently changing my music kept me from getting too bored.
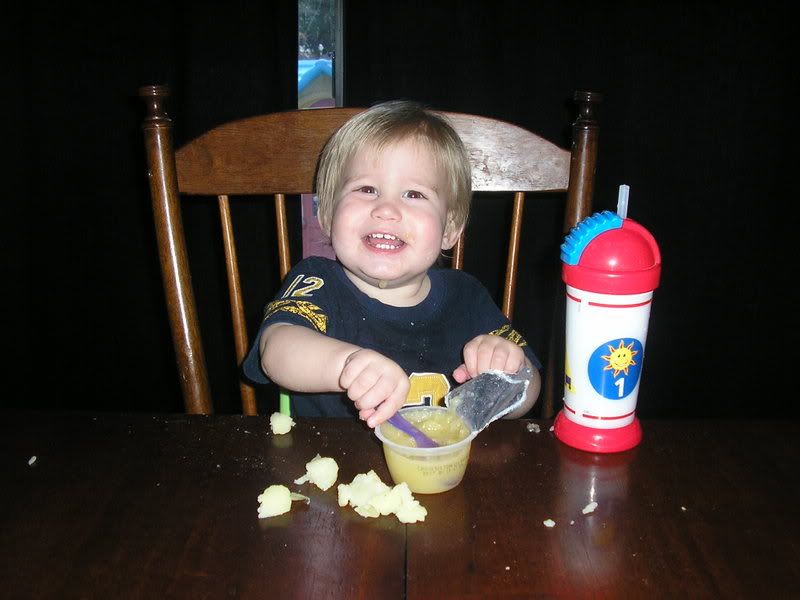
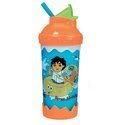 Munchkin’s wins in our house as Mommy and Connor’s favorite straw cup on the market. This cup is durable and has lived through many of Connor’s throws. The straw is nice and soft and Connor really enjoys drinking from this cup. While it leaks (like every single straw cup on the shelves), I have found that it leaks the least out of all of the straw cups I’ve tried. The fact that it leaks minimally and is not too difficult to clean makes this straw cup my pick. The price is steep at $6.97 on Amazon.com, however I paid $4.99 at my local grocery store for mine. I love the Dora, Diego, and Backyardigan prints, but am not fond of the Spongebob Squarepants prints. I had to wait for a new shipment to come in to avoid buying the Spongebob print because he’s just a little too mature and obnoxious for my kids in my opinion.
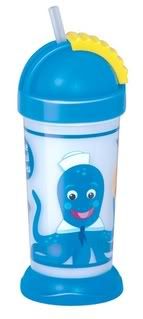 This is my second favorite of the lot. The reason I love this straw cup is cleaning time! The valve is a plug, so you can unplug the valve and clean the straw very easily. All of the other straws are attached to the valve and cleaning is a little more difficult…not impossible, but more difficult than this one! I also love the fun Baby Einstein prints that are age appropriate. This cup leaks more than the Munchkins, however if you make sure the lid’s not screwed too tight, the leaking will decrease. Overall, this is a great straw cup!
 Obviously, the price is GREAT! For $2.99, you get five cups. That’s $0.60 per cup and you can’t beat that in the overpriced baby market we live in! There are no valves, so these cups make for easy cleaning. Even though there are no valves, the leaking is not as bad as I thought. They don’t leak any more than some of the other straw cups that have valves. The lids are very sensitive. If you press on the top of the cup, the contents will travel quickly up the straw. I’ve had a lot of counter messes when using this cup. The straws are not very soft. They are a thick plastic and Connor does not enjoy drinking from these cups. I do keep these cups in stock for extended day trips, friends who come to play, and as back-ups when I am way behind on my dishes.
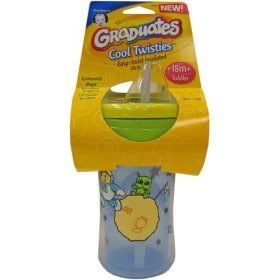 The price is not too steep at $3.95 per cup. The straw is nice and soft and Connor enjoyed drinking from this cup. I also like the fun space design on the cup. Cleaning this cup is not very difficult. While Connor loved this cup, and the price isn’t too bad, I can’t recommend it for a couple reasons. This cup can do some major leaking! Connor is in the stage of throwing things when he’s done (that’s another blog post!) and he has broken two of these cups. He throws all of his cups, but these have been the least durable. Overall, I’d probably not purchase this cup again due to the fact that they can be easily broken by throwing toddlers!
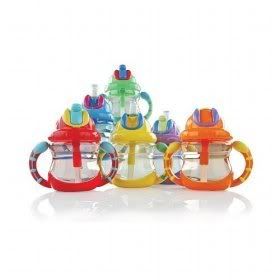 This cup is my least favorite. There are some good things about this cup that I’ll share with you. This is the only straw cup I’ve found that has handles and I love the short squatty shape in contrast to the long stretched shapes of the other cups. The price is GREAT at $3.99 per cup. I bought a two pack for $5.99 at Babies “R” Us. The straw is super soft and Connor really loved drinking from this cup. I also didn’t have too bad of a time with the leaking. While it has many good features, it has a couple problems that keep me from recommending this cup. The straw is three separate pieces. One of the pieces is incredibly small and it is very difficult to put together. It is also incredibly difficult to clean because there is a valve on both ends of the mouth piece. Once you take this straw cup apart, it is incredibly difficult to put back together. If the maker would correct these problems, this would be my favorite straw cup on the shelves.
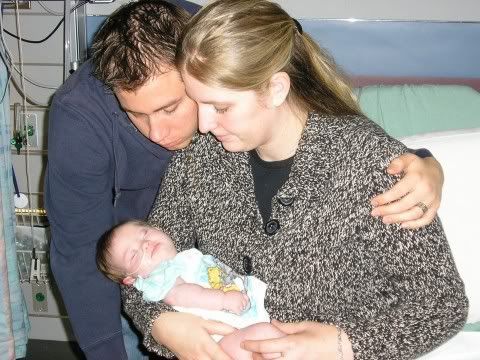 Last week, Darah had her tonsils removed and her third set of tubes placed in her ears. Darah has had 12 surgeries in her 3 1/2 years of life and Connor’s had a same day procedure already as well (tubes placed in his ears). The picture to the left is of Darah before her open heart surgery at three months old. I am aware that not everyone is as “experienced” as we are when it comes to surgery for their child and want to share what surgery days are like for those of you who may be approaching your first surgery with your child. Every procedure, hospital, doctor, nurse, and child are so different. It’s hard to write up a one-size-fits-all post on what you can expect, but some things are pretty standard regardless of what your child is having done, and the emotional impact is pretty strong no matter how major or minor your child’s surgery is going to be!

